Photo Session Style Guide
I KNOW HOW MUCH THIS MATTERS
I am so excited for your session! I feel so honored to capture these special moments in your life together. I’ve created this guide to help you get the most out of your photos, and by the time you’ve read through it, I hope you’ll have all your questions answered and feel excited and prepared for your session. Then I’ll take care of the rest! Your only job is to be yourself, laugh a lot and let me create beautiful photos you’ll love forever.
If you have more questions when you’re done reading through this guide, please don’t hesitate to ask!
We get asked “what should I wear” SO often!
So we decided to prepare a Photography session style guide with a few tips on what colors, patterns, and materials photograph well. First and foremost – we want you to wear what YOU feel comfortable and beautiful in. We can definitely help with some tips on what PHOTOGRAPHS well – but keep in mind, the goal is for you to feel confident and special during your session!
CHOOSING THE RIGHT DATE, TIME, AND LOCATION
I am a natural light photographer because I believe that natural light, from the sun and its reflections, creates beautiful photographs that feel timeless and authentic. And in sun-drenched Southern California, we’re in the right place for knockout natural lighting all year round.
DATE
Most clients schedule their sessions on weekends (Friday, Saturday, Sunday) so my weekends sometimes book out several weeks in advance, but my week days are usually available too. If you have a flexible schedule and are able to shoot on Tuesday, Wednesday, or Thursday, I can usually fit you in right away.
TIME
The best light for your photos will occur during “golden hour,” which is the hour immediately before sunset or right after sunrise, when the sun is close to the horizon and casts soft, rich light on the earth. Even after the sun disappears behind the horizon, we still have 20 minutes or so of soft twilight that’s ideal for photos. To establish a start time for your photo shoot, look up the sunset time for our shoot date (and location) and subtract an hour. That’s the best time for us to start.
Remember, the sun sets much earlier during winter and much later during summer, so make sure to factor that in when choosing your portrait session date, especially if you’re taking off work or have evening plans afterward.
PRO TIP FOR FAMILIES WITH KIDS
You can set you photos up for success by planning your photoshoot around a time of day when your kiddos are happiest. Even if that time doesn’t perfectly occur at golden hour, it’s more important to me that your kids are in a good mood than that the light is perfect. If your kids are happiest in the middle of the day, we can either select a location that has some shade to shoot in, or maybe consider an at-home session that is softly lit by a bright window nearby.
Sometimes the timing of your shoot can be determined by the location.
When shooting at the beach here on the coast, we usually have lovely golden light right up until the scheduled sunset. If we opt for a park setting, the direct light disappears a little sooner, which means we can start earlier in the evening if that’s better for your schedule. If we’re shooting indoors (such as an at home session), the middle of the day is great because bright light outside turns your windows into soft light sources.
PRO TIP FOR EARLYBIRDS
Did you know there’s a golden hour right after sunrise too?
I’m a morning person, so if you are too, I would LOVE to plan a sunrise shoot with you. The benefits of a sunrise session are that we get the whole beach (or park, or pier) to ourselves, and my mornings usually aren’t booked up weeks in advance like my weekend evenings. If you’re willing to brave an early wake up, don't hesitate to suggest it... I’m your girl.
LOCATION
The location of your session is up to you! The first thing to decide is whether you’d like your session to have an urban or natural feel. There is so many options to choose from in the city, farm, mountains, on the water, etc.
Here are a few of my favorite shoot locations where I regularly book sessions:
The Beach (there's nothing like the view of the waves behind you)
Conway Riverfront Park
FOR FAMILIES
CHOOSE A LOCATION WITH YOUR LITTLE ONES IN MIND
Outdoor, open-air environments are a great backdrop for kids to explore. I recommend avoiding downtown areas where there are a lot of busy roads and distractions, especially if you have young children. It’s best to have a place where you can all feel safe and comfortable, and not have to worry about people or cars in the background. If you have a place in mind that is special to your family, such as a farm or garden that you often go to, that is great too!
If you've never done a family photo session at home, you might want to consider doing one there. Home is a great place for photos because it's a source of endless picture-worthy activities and routines. Home is where your kids are most comfortable (i.e. happiest and silliest) and most likely to demonstrate their unique personalities. Home is also where the memories are made, so a home photo session is a great way to capture some of your favorite routines, moments, and spaces. Another hidden plus of a home session is that in the event of a wardrobe mishap, you can always change things up. Don't feel like you need to clean and decorate your whole house. Just tidy up one or two rooms (preferably the ones with the best light) and we'll have a great time!
I also love shooting family photos at the beach! It’s ideal because the sand and rocks provide natural seats and props, and the backdrop is incredible. But if you’ve got toddlers, sometimes the sand and crashing waves can be overwhelming. You know your kiddos best, so pick a location where they’ll feel comfortable and energized, not fearful and overwhelmed.
LET’S TELL A STORY
One way to make your photo session particularly special and memorable is to make your pictures tell a story. Three great ways to do this are through selecting a unique location, adding props, or planning an activity (or all three)!
STORYTELLING THROUGH LOCATION
Do you have a special place you love to go on dates?... Got access to an orange grove where you can pick oranges?... Want to create some photos against the backdrop of a local music festival?... Want to bring me along when it’s time to pick out your fall pumpkins at the local pumpkin patch?... Do you know someone with an Airstream in their backyard that you can commandeer for an afternoon?... Is there a local landmark you’ve always wanted to visit but never had a reason to?... Think outside the box and let’s go somewhere unique. Please note: try to pick a location that has some natural light.
STORYTELLING THROUGH PROPS
I’m not talking about fake mustaches and feather boas. I’m talking about a flower crown (or bouquet!), a shiny vintage car on a roadside overlook, sparklers, smoke bombs, balloons, and more.
STORYTELLING THROUGH ACTIVITY
Want to try something a little different? Turn your photo session into an activity! From baking cookies at home to hitting your local gym together to getting messy making clay pots, there are so many activities that will make you smile, laugh, work together, and bring out the unique personality of your dynamic relationship(s). It can be a simple activity like a champagne toast or a picnic or a more involved activity like setting up a tent at the beach and jumping into the waves fully clothed. Staging an activity will bring out lots of candid moments and keeps our time together interesting and varied.
There are so many things we can do to make your photo session one of a kind. I’m up for just about anything (as long as it’s legal), so if it sounds like fun to add a little something extra, let me know and we can chat through the logistics.
WANT TO THINK WAY OUTSIDE THE BOX??
Your photo session is an opportunity to think outside the box! I encourage you to brainstorm unique locations that you might have special access to that most people don’t. For example, maybe you, or someone in your personal or professional network, can secure permission to a location that would otherwise be off-limits, like a beautiful private estate or industrial space. Maybe it’s a family ranch, upscale hotel, a sailboat, airplane hangar or rooftop view. The sky is literally the limit! Spend a few minutes thinking about it and checking around. You’ll be surprised with what you come up with. Plus, if something seems out of reach, just remember: you never know until you ask!
Pro Tip
There is no such thing as "too dressed up" for your photo shoot.
Style Tips For Her
DON’T BE AFRAID TO DRESS IT UP
Have you ever dreamed about rocking a romantic gown, tulle skirt, or flower crown, but just never had an occasion for it? This is your chance to do it up! Remember: there is no such thing as “too dressed up” when it comes to your portrait session, so don’t be afraid to have some fun!
Dresses and skirts look most stunning because they really flatter every female body, especially on camera. What's more, a full and flowy skirt is like a built-in "prop," giving you something to twirl and swirl, and adding effortless movement and interest to your photos. I recommend avoiding pants and shorts for your session, and saying yes to a dress instead.
TIPS FOR CONSIDERING YOUR COLOR, FABRIC & CUT
COLOR
When choosing color(s) for your outfits, I recommend selecting soft, light tones and muted shades. By avoiding ultra-bright, bold colors, it will help bring all the attention to your faces.
The camera loves soft pastels and neutrals like peach, lavender, blush, sky blue, sage green, golden yellow, heather gray, creams, tans, leather, denim, and soft white. This soft color palette fits beautifully into almost all natural outdoor environments.
**Black, though slimming, becomes very shapeless in photos. Avoid black if you can, but if you must wear it, black pants are fine.**
FABRICS & PRINTS
Fabric selection has the power to add positive interest or negative distraction to your photos.
A solid-colored fabric is always a winner, but if you don't want to wear (or don't have) a solid-colored dress, select a print that is minimalist and understated, rather than bold and design-forward. Think calicos, dainty florals, repetitive geometric motifs, checkered patterns, or small stripes.
Another way to add visual interest is to opt for texture like lace, seersucker, linen, denim, chiffon, or tulle.
Remember: the goal isn't to have someone look at your photo and immediately say, "Whoa look at that dress." Instead you want them to say, "Oh my goodness you look stunning."
CUT
Flowy dresses and skirts look amazing on camera because they bring extra movement to the photos, especially when mixed with nature, like our dramatic beaches. Consider a cut that allows for beautiful movement in the images.
If the location you've chosen might be windy (as many beaches are) I recommend a mid-thigh or longer hemline. Wind is our friend most of the time because it creates drama and movement, but not so much when you have to keep one hand on your backside to keep the dress down.
A good rule of thumb I’ve learned is that: the eye is drawn to what is revealed. Meaning bare arms up to the shoulders, bare legs in short dresses, and particularly low-cut necklines—no matter how great they look—might distract from your face in the photo. I'm not saying don't do it... I'm saying be aware.
PRO TIP FOR MULTIPLE OUTFITS
If you’re bringing a couple outfits (as for an engagement session), save your favorite outfit for last. It takes a little time to warm up and get comfortable in front of the camera, so your favorite photos will likely happen near the end.
PRO TIP FOR FAMILIES WITH KIDS
If you have smaller children, we’ll likely have you sitting or crouching down on the ground to interact with them on their level. Dresses of any length photograph beautifully, but if you have little ones in your photos, a knee-length or longer dress or skirt will make moving around with your kids much easier.
GOING FULL GODDESS-MODE
If you’re an expecting mother, I always recommend floor-length gowns or maxi dresses. Whether form-fitting or loose and flowy, these dresses create the best silhouettes to flatter your figure and really highlight your bump.
Some expecting mothers love to incorporate flower crowns or headpieces as well.
FOOTWEAR
Heels elongate women’s legs, making them look fabulous. Closed-toed heels in particular look great on camera because they carry out the line of your leg all the way down to your toe. If your toes are showing in a peep-toe heel, you might want to schedule a pedicure before your session so you don’t regret letting your toes show. These little tricks make all the difference! If there will be much walking at our photo location (or if your heels are particularly uncomfortable), you might consider packing a pair of flip flops for swapping out in between picture spots.
IF YOUR SESSION IS AT THE BEACH, plan to be barefoot, because your feet will likely get sandy and maybe a little bit wet. In this case, you would wear a pair of easy-to-kick-off sandals or flats to wear from the parking lot to the sand.
GETTING READY
HAIR & MAKEUP
Professional hair and makeup is on the top of most of my clients’ checklists because it looks amazing on camera and removes the stress of getting ready on your own. This is the time to treat yourself! Whether it’s lash extensions or blown-out hair, professional hair and makeup will give you an extra boost of confidence in front of the camera, and it always photographs like a dream.
If you’re working with a makeup artist, have him/her apply your makeup in natural light, if possible, so that it looks fresh and not too heavy. Plus, that’s the type of light we’ll be shooting in, so it’ll give you the best expectation of how it will translate on camera. Some clients feel like their professional makeup is “too much” at first, since it’s more than they would wear on a normal day, or that their false lashes look too big, so if you feel that way at the beginning, don’t worry! Good makeup artists know how to get it all just right for the camera—and clients always love the final result.
ACCESSORIZE!
Pairing an accessory or two with your outfit can really help bring some extra dimension to your images, and also be a nice tie-in when you’re coordinating with a group.
Big statement necklaces bring a lot of pop to the photos, while the smaller, delicate ones are not as noticeable on camera. Belts, bracelets, and earrings bring great visual interest, so choose one or two that don’t compete for attention. Fresh florals in a crown can be a really romantic touch for you or your girls as well.
DON'T FORGET
- Steam your dress so you don't have any fold lines or wrinkles
- Cut the tags and ribbon hangar straps out of it, so there aren't any oopsies peeking out from under your arms.
- Try it on—with the underwear you plan to wear—and make sure there aren't any gaps or obvious lines.
PRO TIP FOR SMART GALS ON A BUDGET
If there is a Sephora or Ulta store in your area, I hear you can get a free mini makeover from one of their amazing beauty experts, for free and no purchase or appointment necessary.
Style Tips For Him
THE BEST FIT
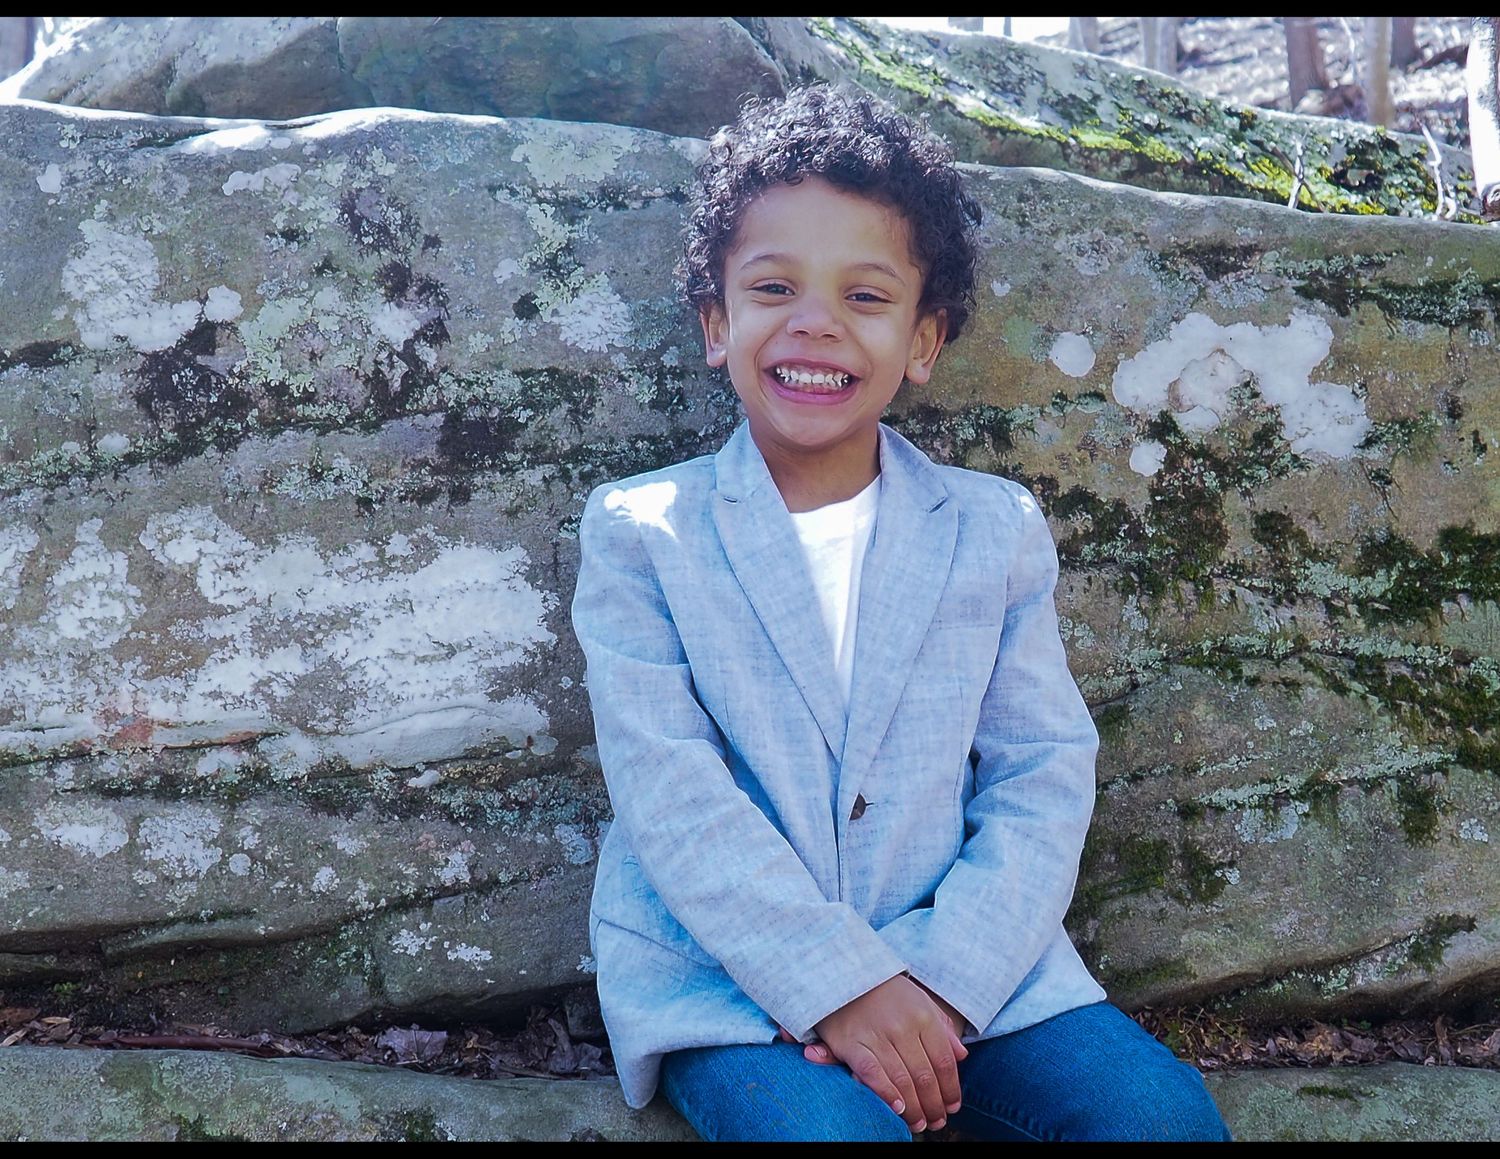
Long, fitted pants and closed-toed shoes are a very sophisticated look for men. They draw attention away from his legs and feet and place it where you want it: on his handsome face. Fitted dress pants or fitted solid-colored pants work best on camera. Denim looks great if it's nice denim. Pinstripes and plaid patterns tend to distract the eye. I also recommend staying away from graphics and logos.
MIX IT UP
Feel free to mix a suit coat, blazer or sport coat with a different pant color. It adds some extra visual interest, and breaks up the color tones. This is a fresh take on a timeless classic!
LAYERED LOOKS
Next time you walk by a store like J. Crew, you’ll notice the male mannequins and models are always wearing several layers at once. Layers on men look great on camera. Even if it feels overdressed, adding another layer will bring extra dimension and visual interest to your photos. Blazers, vests and sweaters up the level of any look. Don’t be afraid to get a little creative with layers!
IT’S ALL IN THE DETAILS
Brown leather dress shoes complement almost every look, whether he’s wearing a full suit or a blazer and colored pants. Ties, bowties, pocket squares, colored socks, belts, tie clips, suspenders, vests, watches, and statement rings are sharp complements to any outfit for men and boys alike.
How To Get Your Man Ready
Though your guy might be just as stoked (if not more so) for your session as you are, it's possible that he's not... and that's common! It might be difficult for him to get stoked to take photos for an hour if he doesn't have an expectation of what’s to come and why it’s so important to you. Take fifteen minutes to educate and empower your guy. Tell him why you chose me as a photographer and why you like my style of photography. Show him some of your favorite sessions that I’ve done, explain why you love them, and express to him how much it means to you. Trust me, once he knows it's important, he’ll light up the camera for you!
The most common thing I hear from guys before photo sessions is this: because of a bad experience in the past (or a story they heard), they don’t like taking photos or don’t think they’ll be good at it. By the time we’re done, though, they can’t believe how fast it went and just how much fun they had!
Style Tips For Families
My number one principle for dressing a family for their photo session is "coordinating, not matching."
Use the tips below to make sure everyone's outfit looks amazing individually and as a group.
1) START WITH A "THREE CORE COLOR" PALETTE OF NEUTRALS & NEARLY-NEUTRALS
Before you go unloading your whole family's dressers and drawers, you can simplify this process with a plan. And the plan is to pick a palette. Start by selecting a base plus 2-3 colors from the neutral and nearly-neutral swatches below and build most of the outfits using those 2 to 3 colors.
Note: black becomes very tw0-dimensional and blob-like in photos, so if you want to incorporate black, keep it to a minimum and keep it on the bottom half of the outfit if you can.
2) ADD ONE OR TWO ACCENT COLORS
If you want to add a bit of variety, or if you can't find a complete outfit from your 3 core colors, add in one or two accent colors, to be used less frequently than the core colors.
These colors should complement the neutrals and nearly-neutrals that you're already using.
Finish off by adding nonessential clothing items such as wraps, sweaters, hats or statement accessories such as watches, bow ties, bracelets, hair bows, and jewelry that fits the core and accent colors.

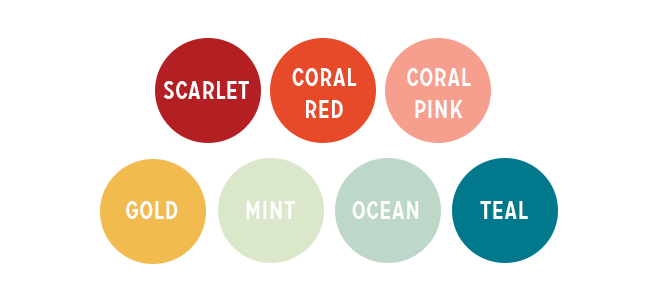
SAMPLE PALETTES
Use these sample palettes to visualize wardrobe options for your family.


Got an infant or baby girl in your crew?
Don't forget the bloomers!
It's always a bummer to see a diaper peeking out from under a dress in an otherwise perfect photo. This is easy to fix by slipping bloomers over the diaper so that regardless of how active everyone gets, the diaper is out of sight.
Want to simplify your family outfit even more?
Go all neutral.
Does picking a palette sound like too much? You can hit the easy button and still let everyone shine by going all-neutral all the way. Start with cream, tan and beige for most of the pieces, then mix in a couple nice denim, black, or gray pants, and finish it off with a couple hits of visual interest like an animal print shoe or hair bow. Simple, minimalist, beautiful.
How To Prep Your Little Ones
TIP#1: Practice smiling. I know this sounds silly, but try practicing with cues like, "Show me your teeth!" or "Say ice creeeeam!"
TIP #2: Find a song, dance, or video that captures their attention and brings out joy. I've learned that small kids can't fake it. They feel what they feel. And you can hack that! Prior to your photo session, practice singing some songs or learn some silly dances that make your child(ren) genuinely happy. Another genius method of doing this is to load up a YouTube video that your kids like watching or listening to. If I hold it next to my camera, they'll look my way!
TIP #3: Pack a toys and snacks bag. Before your session, pack a bag with snacks, water, and any small objects (like toys or treats) that might help us get their attention when it’s time for them to look at the camera.
TIP #4: Give a pep talk. If they are old enough to understand you, it’s a good idea to prepare them for what’s to come before the session starts. Explain how much the photos mean to you so they know to be on their best behavior.
TIP #5: Good old fashioned bribery. A lot of families discuss and pick a treat that the kids will receive after the session if they’re good listeners and smilers, like an ice cream cone, for example.
That being said, don’t be worried about how your kids will behave or embarrassed if things don’t go as planned. They’re little, and their unfiltered, unpredictable emotions and outbursts are part of the reason you want to remember this season in life. It's my aim to help you embrace these moments with them instead of trying to make them act a certain way for an hour or more. We will make sure to get a few shots of everyone smiling and looking at the camera, but for the most part I want you to just have a great time and be yourselves.
My favorite thing to capture is all of those in-between moments that can’t be perfectly posed anyway. If one of your children starts running away from the group giggling, scoop them up and smother them in tickles and kisses. If they are shy or upset, hold them close and tell them how wonderful you think they are while tucking their hair behind their ear. If you as a parent keep smiling and having a good time, I will be able to capture sweet moments the whole way through.
"Usually I think if there is something imperfect in a photograph it makes the picture more real. Photographs that are slick, smooth, and perfect seem less honest to me."
—John Loengard
Wardrobe Tips
CHOOSE NEUTRAL COLORS
We love neutrals because they are classic and timeless, which is probably what you want out of your photos. So keep it simple and effortless.
Dark clothing can be slimming in real life, however on camera it adds weight. Camera’s can’t see in 3D like the human eye can and they have a hard time finding the curves of the body when dark colors are present. This will result in your figure having a flat and boxy shape.
Bright colored clothing distracts from the face, emotions and interactions within the photo. Most bright and bold colors interact poorly with skin tones and often reflect the color onto your skin tone. If you must wear color, try to keep it in the pastel family. Pale blues, yellows, blush.
Light clothing can be airy and fresh. It can bring a beautifully simple touch Think crisp white shirts, breezy white dresses and beige linen pants.
PRINTS AND PATTERNS
We can’t stress this enough! Avoid crazy patterns like Neither polka dot, paisley, herringbone, leopard or tiger. These are a huge distraction and create awful distortions in digital portraits. You can sometimes get away with a small, floral print if it’s on a dress, but make sure to check with us first. Patterns are best added into your props to go along with your wardrobe.
COVER YOUR LIMBS
Even the slimmest arms will photograph large. To assist with this style-wise, any kind of fitted 3/4 length or longer sleeve is flattering.
TEXTURE
Texture is amazing! Lace, linen, knots and airy materials. Adding texture to your wardrobe can really make the image pop. Think about this when you plan your accessories too.
JEANS
My suggestion is to avoid wearing jeans if you want your photos to look the most professional. Jeans can work in certain situations for certain sessions depends on the setting and background. But overall I like to encourage everyone to avoid them you just get overall better images.
FEEL COMFORTABLE
This is a big one. You want to be as comfortable as you can in the clothing you wear. If your dress is too tight and you don’t feel you best, it will show in your expression. If your shoes are killing you, same thing. On the flip side, be sure your clothes aren’t too baggy or loose. You want to look polished.
ACCESORIZE
Fun hats, textured scarves, bold jewelry and great shoes. Take this opportunity to think outside the box. We highly encourage our clients to include “personal accessories” like their journals, favorite coffee mug or even their pet. A cool pair of reading glasses is a great way to change up your look between wardrobe changes, too. We offer outfit changes on our extended sessions, however if you booked a standard or a mini session you typically don’t have time for a wardrobe change. So a quick swap of your accessories can make all the difference. A scarf and hat can give jeans and a blouse, a completely new look. Adding some glasses and a your favorite handbag can also completely change the vibe of your session!
PHOTO SESSION CHECKLIST
- Set date, time and location with Kelsey
- Review guide for style tips
- Select everyone's outfit
- Schedule hair and makeup appointments (if desired)
- Pack a bag with:
- Flats or flip-flops for walking between photo spots (if you choose to wear heels)
- Touch-up makeup
- Snacks and water for the little ones
- If you have a toddler or younger, small eye catching toys (or lollipops) to hold their attention
PHOTO EDITING AND DELIVERY TIMELINE
I will email you an invitation to view and download your photo gallery within two calendar weeks after your session.
ONE FINAL NOTE
I know that all of this is a lot to think about. I created this guide to help make your family session experience something you look back fondly on for years to come. At the end of the day, though, the location you choose and the outfits you select won’t matter nearly as much as the memories you make together. Your future memories are the most important thing to me, and I want your session to be a time for you to just be yourselves and enjoy. Have fun together. Laugh a lot. And I’ll take care of the rest!